HOME > TECH
Build and Host Backend and Frontend with Next.js, Parse Server, Back4App and Cloudflare

- Introduction
- Prerequisites
- Setting Up Your Development Environment
- Creating an app in Back4App
- Creating a Basic Frontend with Next.js
- Connecting Next.js Project to Back4App
- Deploying the Next.js Frontend with Cloudflare Pages
- Example Project Repository and Live Demo
1.Introduction:
In this tutorial, we will guide you through the process of creating a full-stack web application using Next.js for the frontend, Parse Server for the backend, hosting the backend on Back4App, and deploying the whole application with CloudFlare Pages. We will cover setting up your development environment, creating frontend project, setting up the Parse Server backend, hosting it on Back4App, deploying the Next.js frontend, and integrating them. Let’s get started!
2.Prerequisites:
Before we begin, make sure you have the following:
•Node.js and npm installed.
•A Back4App account (Free to create).
•A Cloudflare account (Free to create).
Knowledge prerequisites:
•Basic knowledge of JavaScript.
•Familiarity with React and Next.js.
•Some understanding of Node.js.
3.Setting Up Your Development Environment:
First go to the directory where you want to create the project. Then run the following command:
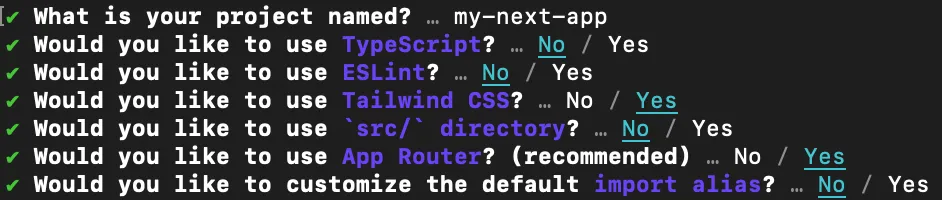
After running that command, you have to answer several questions about your project. For the sample project, it will be sufficient to make the following selections:
Testing the Setup Locally
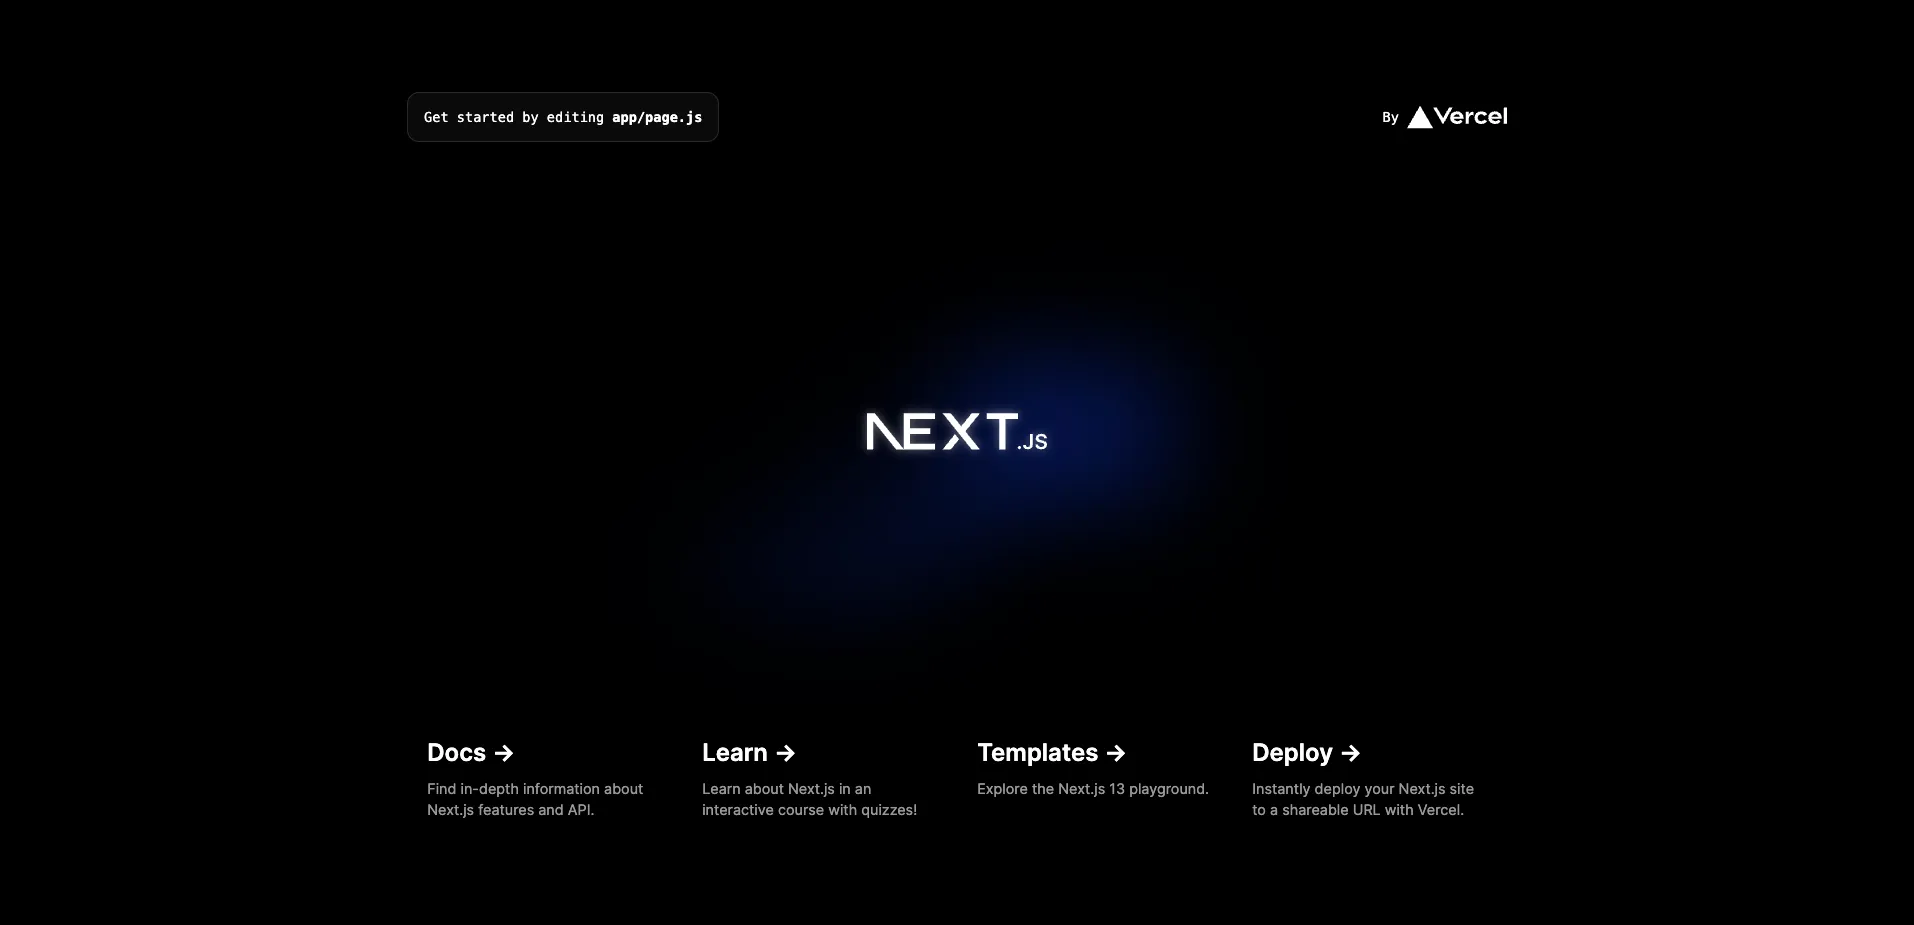
Visit http://localhost:3000 in your browser to see your Next.js app running locally. If you see the following page, your Next.js project is ready to use:
Now we can move on to the backend preparations.
4.Creating an app in Back4App:
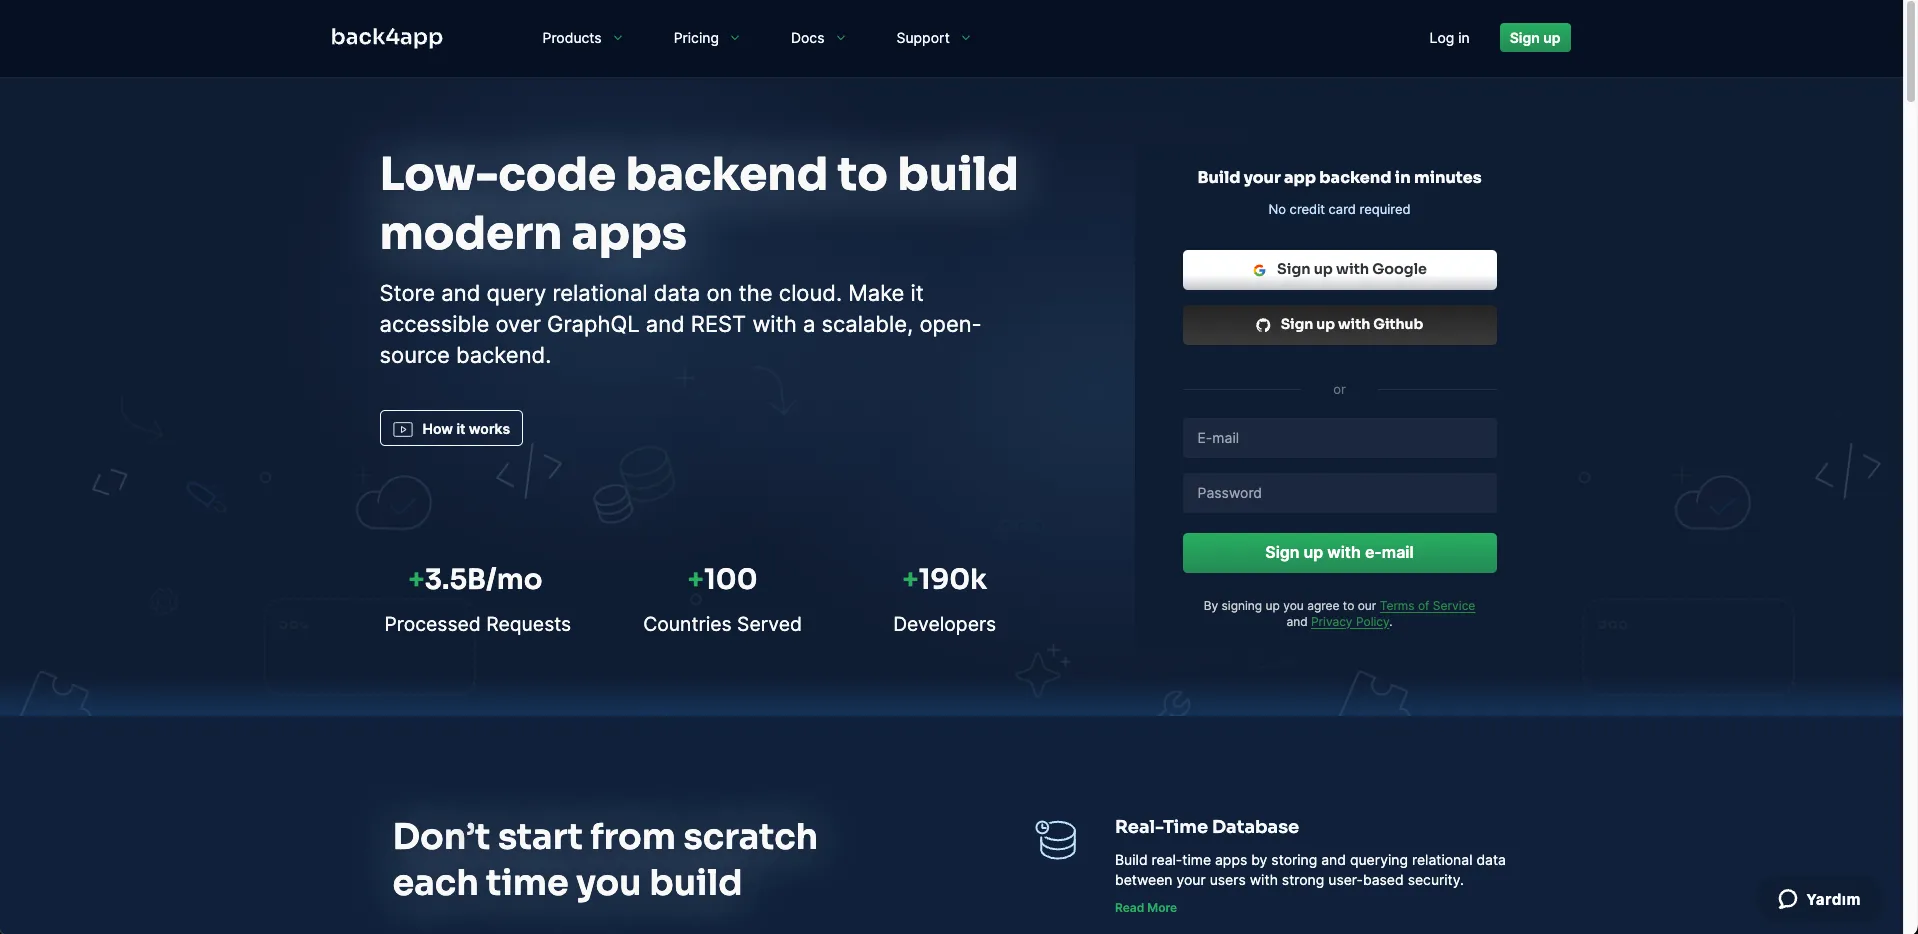
To register a Back4App account, first go to the Back4App website.
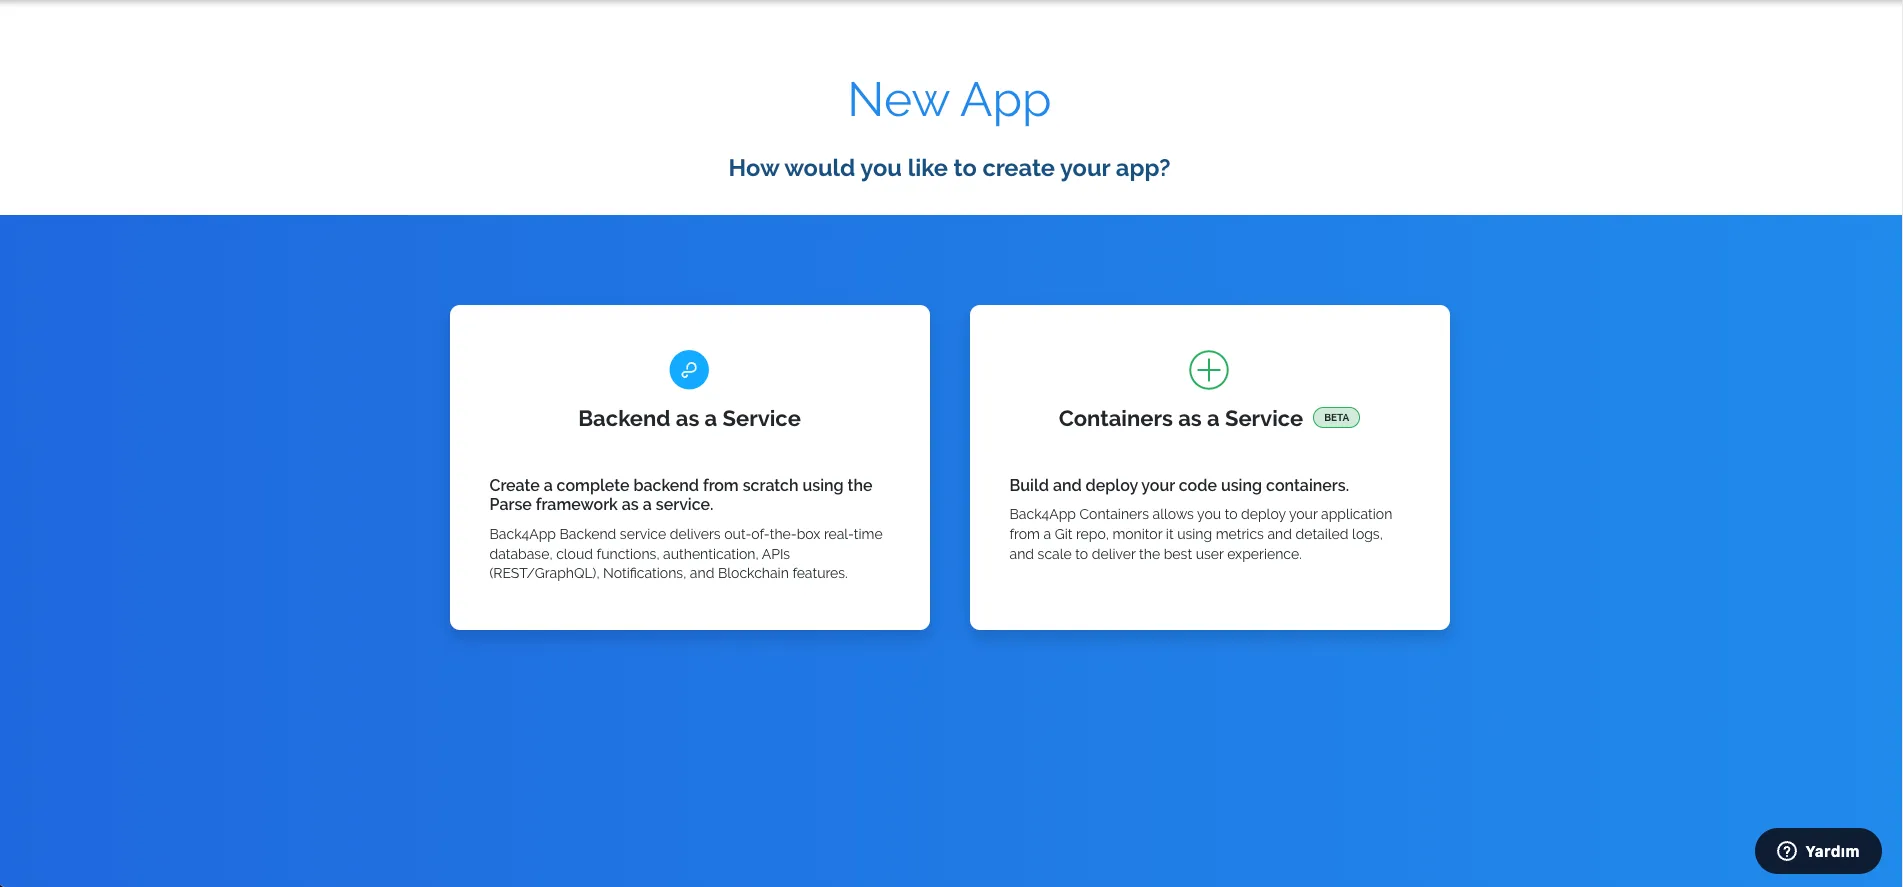
After registration, on this screen we select the Backend as a Service option.
Then on this screen, you can give your application the name you want and continue.
After a short loading screen you will see this screen. Congratulations, you have created your Back4App application!
5.Creating a Basic Frontend with Next.js:
Now we will create a simple project consisting of CRUD operations.
First, let’s install the react-icons package required for the icons in our project:
The file structure of our project is like this:
globals.css
layout.js
page.js
AddPerson.js
Modal.js
Person.js
PersonList.js
tailwind.config.js
6.Connecting Next.js Project to Back4App:
Let’s now install the only needed dependency, Parse JavaScript SDK, to integrate your App with Back4App servers. Run the following command on your project root directory:
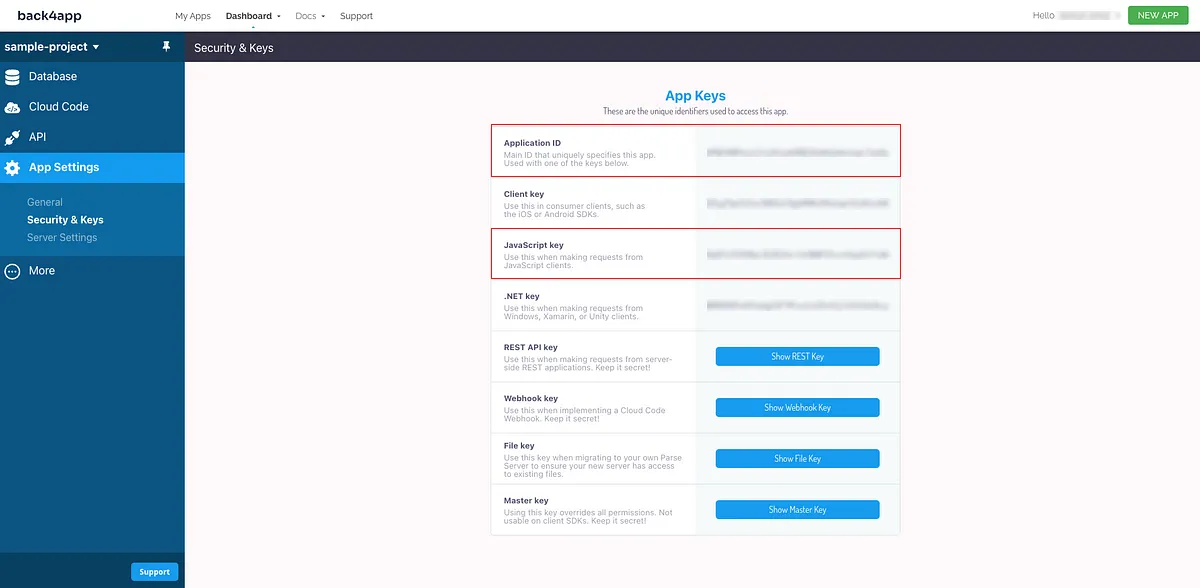
Go to your Back4App App’s Dashboard and get your App Keys under App Settings->Security & Keys . Note that you will need two keys to connect with Back4App, the Application ID and Javascript KEY.
Go to your parseService.js fileand initialize the Parse SDK using both the Application ID and the Javascript KEY.
Code Samples for Basic CRUD Operations
We can write our Create, Read, Update, and Delete operations in the parseService.js file.
Test your App
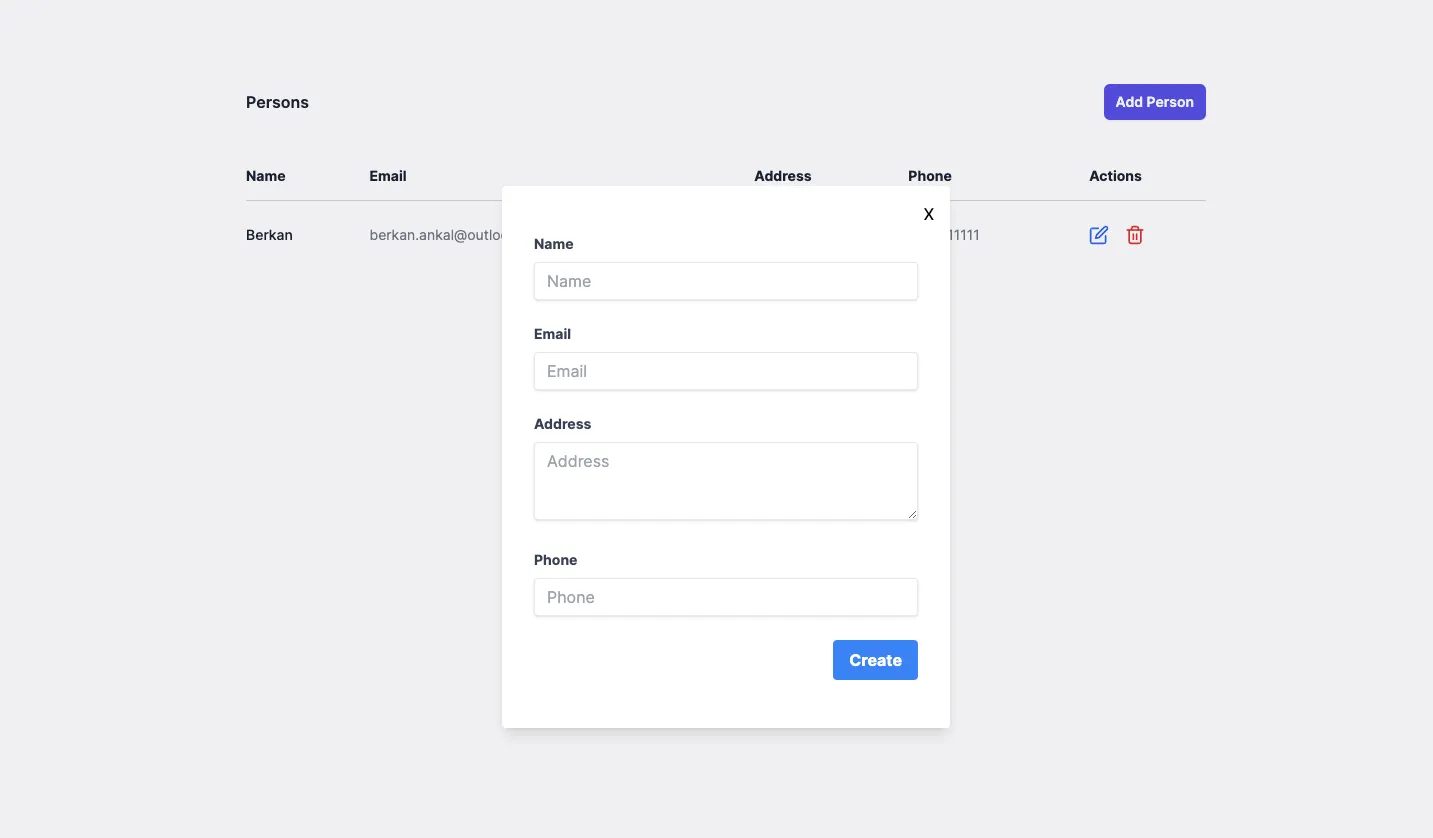
After running your project with the npm run dev command, add a new person with the Add Person button.
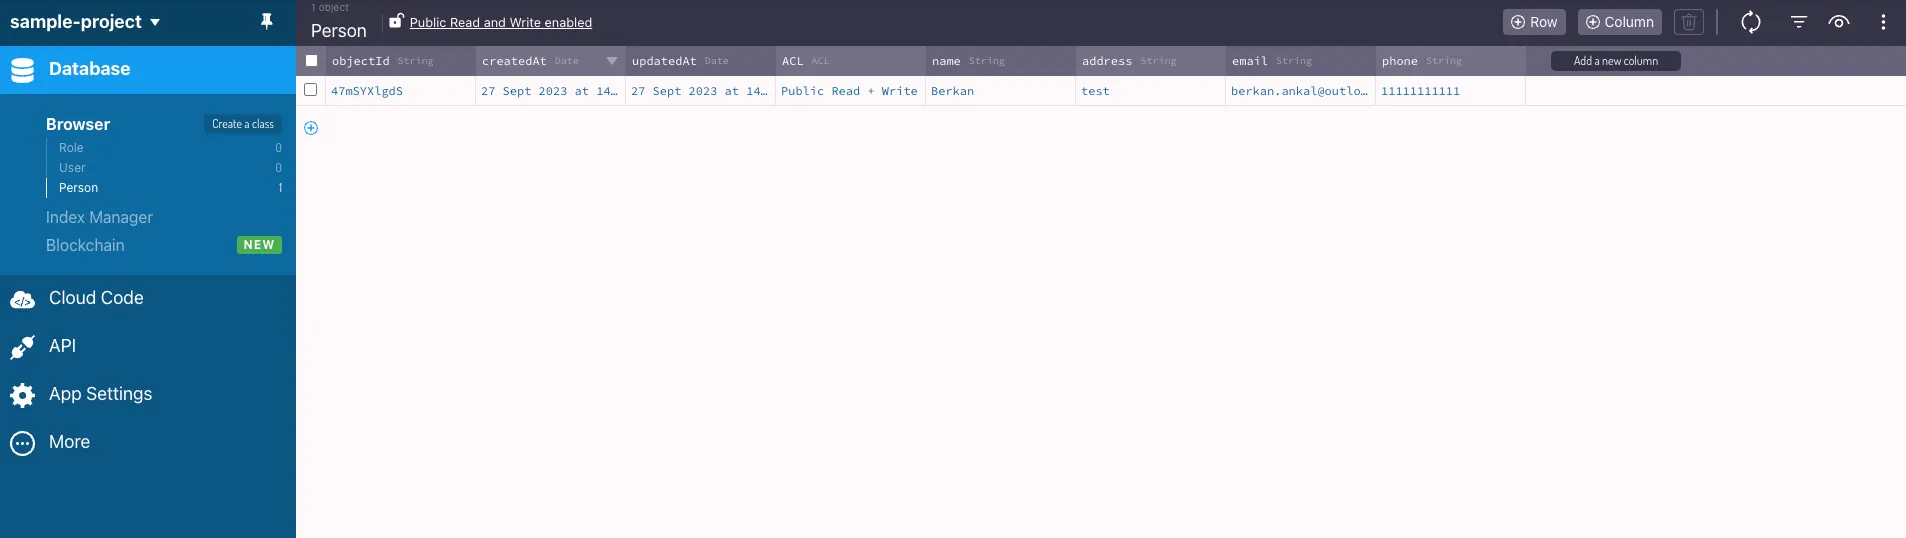
You’ve saved a data object from Back4App. You can also check the data on your App Dashboard and clicking on Person class.
Now our app is ready to deploy.
7.Deploying the Next.js Frontend with Cloudflare Pages:
Before deploying your frontend, set up a Git repository for your project. After setting up your project and pushing it to GitHub or GitLab, the next step is to deploy your website using Cloudflare Pages. Here’s a step-by-step guide on how to do this:
A) Log in to Cloudflare: Visit the Cloudflare dashboard and log in to your account. If you don’t have an account, you’ll need to create one.
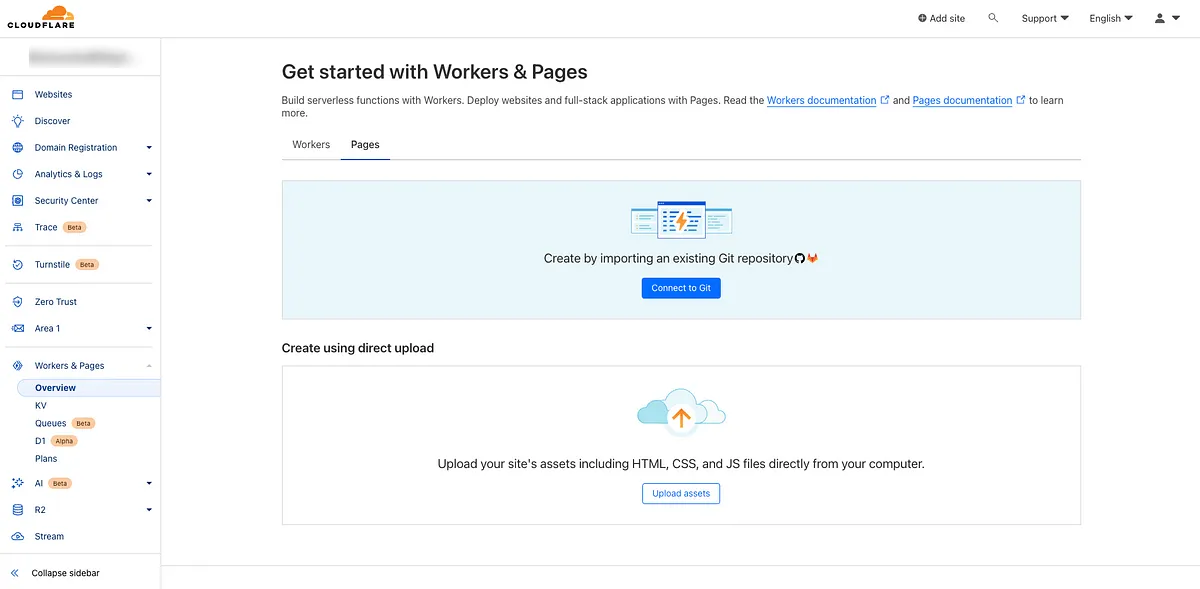
B) Navigate to Cloudflare Pages: On your account’s homepage, go to Workers & Pages from the left menu. Then go to the pages section. This is where you will manage your deployments.
C) Connect to Git: Click on the “Connect to Git” button and connect your GitHub or GitLab account. You’ll need to authorize Cloudflare Pages to access your repositories.
D) Select Repository: Choose the git repository that contains your project. Then click the Begin Setup button.
E) Set up builds and deployments: All we need to do in this step is to select Next.js from the Framework preset section and then click the Save and Deploy button.
F) Congratulations! : After a short wait, your website will be deployed. You can go to your website by clicking on the link.
Note: If you see this error when your site opens, don’t worry.
• Select Workers - Pages and in Overview, select your Pages project.
• Select Settings - Functions - Compatibility Flags.
• Add the nodejs_compat compatibility flag to your Preview and Production deployments.
• After saving both with the save button, go to the Workers & Pages section again. Click on the View Details button at the bottom right of your project.
• Click on the Manage Deployment button at the top right and select the Retry Deployment option. After a short wait, your site will be deployed again and you will no longer see any errors when you go to your site.
8.Example Project Repository and Live Demo:
To explore the code and experience the example project live, you can access the following links:
Live Demo
Github Repository
Conclusion
In this tutorial, you have learned how to build a full-stack web application using Next.js, Node.js, Parse Server, Back4App, and Cloudflare. You now have the knowledge to create and deploy your projects. Consider extending your application’s features and sharing your creations with the community.
Happy Coding!
In this tutorial, we will guide you through the process of creating a full-stack web application using Next.js for the frontend, Parse Server for the backend, hosting the backend on Back4App, and deploying the whole application with CloudFlare Pages. We will cover setting up your development environment, creating frontend project, setting up the Parse Server backend, hosting it on Back4App, deploying the Next.js frontend, and integrating them. Let’s get started!
2.Prerequisites:
Before we begin, make sure you have the following:
•Node.js and npm installed.
•A Back4App account (Free to create).
•A Cloudflare account (Free to create).
Knowledge prerequisites:
•Basic knowledge of JavaScript.
•Familiarity with React and Next.js.
•Some understanding of Node.js.
3.Setting Up Your Development Environment:
First go to the directory where you want to create the project. Then run the following command:
npx create-next-app@latestAfter running that command, you have to answer several questions about your project. For the sample project, it will be sufficient to make the following selections:
Testing the Setup Locally
  cd my-next-app
  npm run dev
Visit http://localhost:3000 in your browser to see your Next.js app running locally. If you see the following page, your Next.js project is ready to use:
Now we can move on to the backend preparations.
4.Creating an app in Back4App:
To register a Back4App account, first go to the Back4App website.
After registration, on this screen we select the Backend as a Service option.
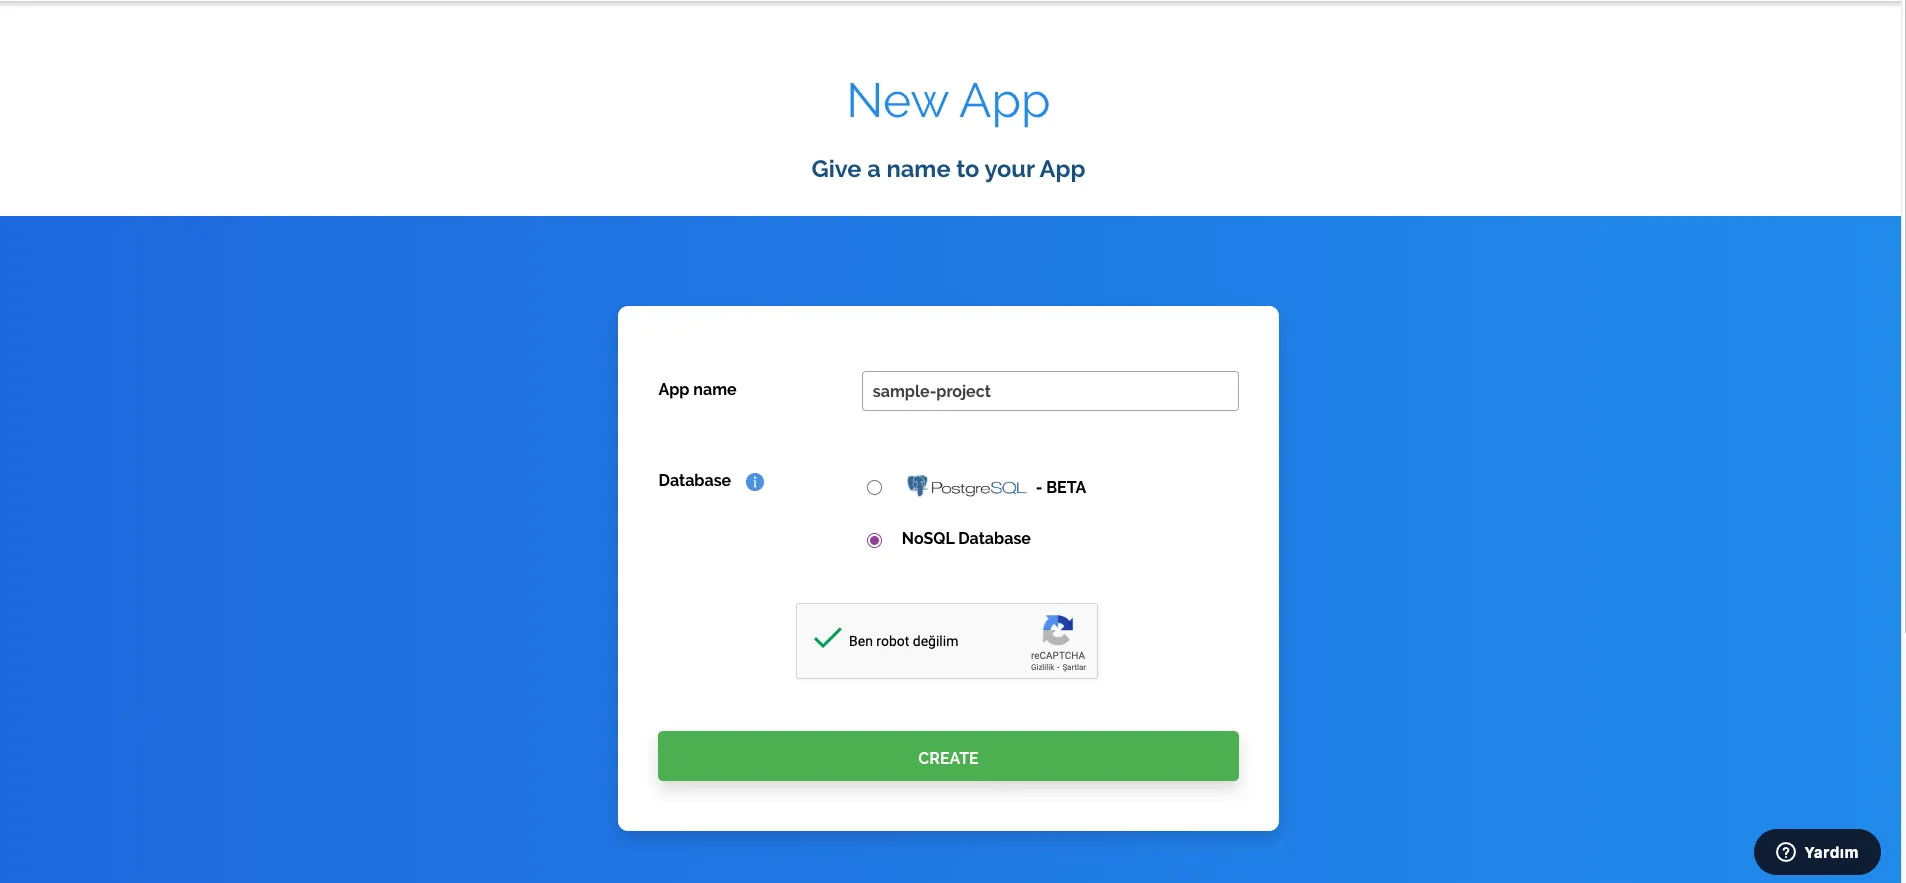
Then on this screen, you can give your application the name you want and continue.
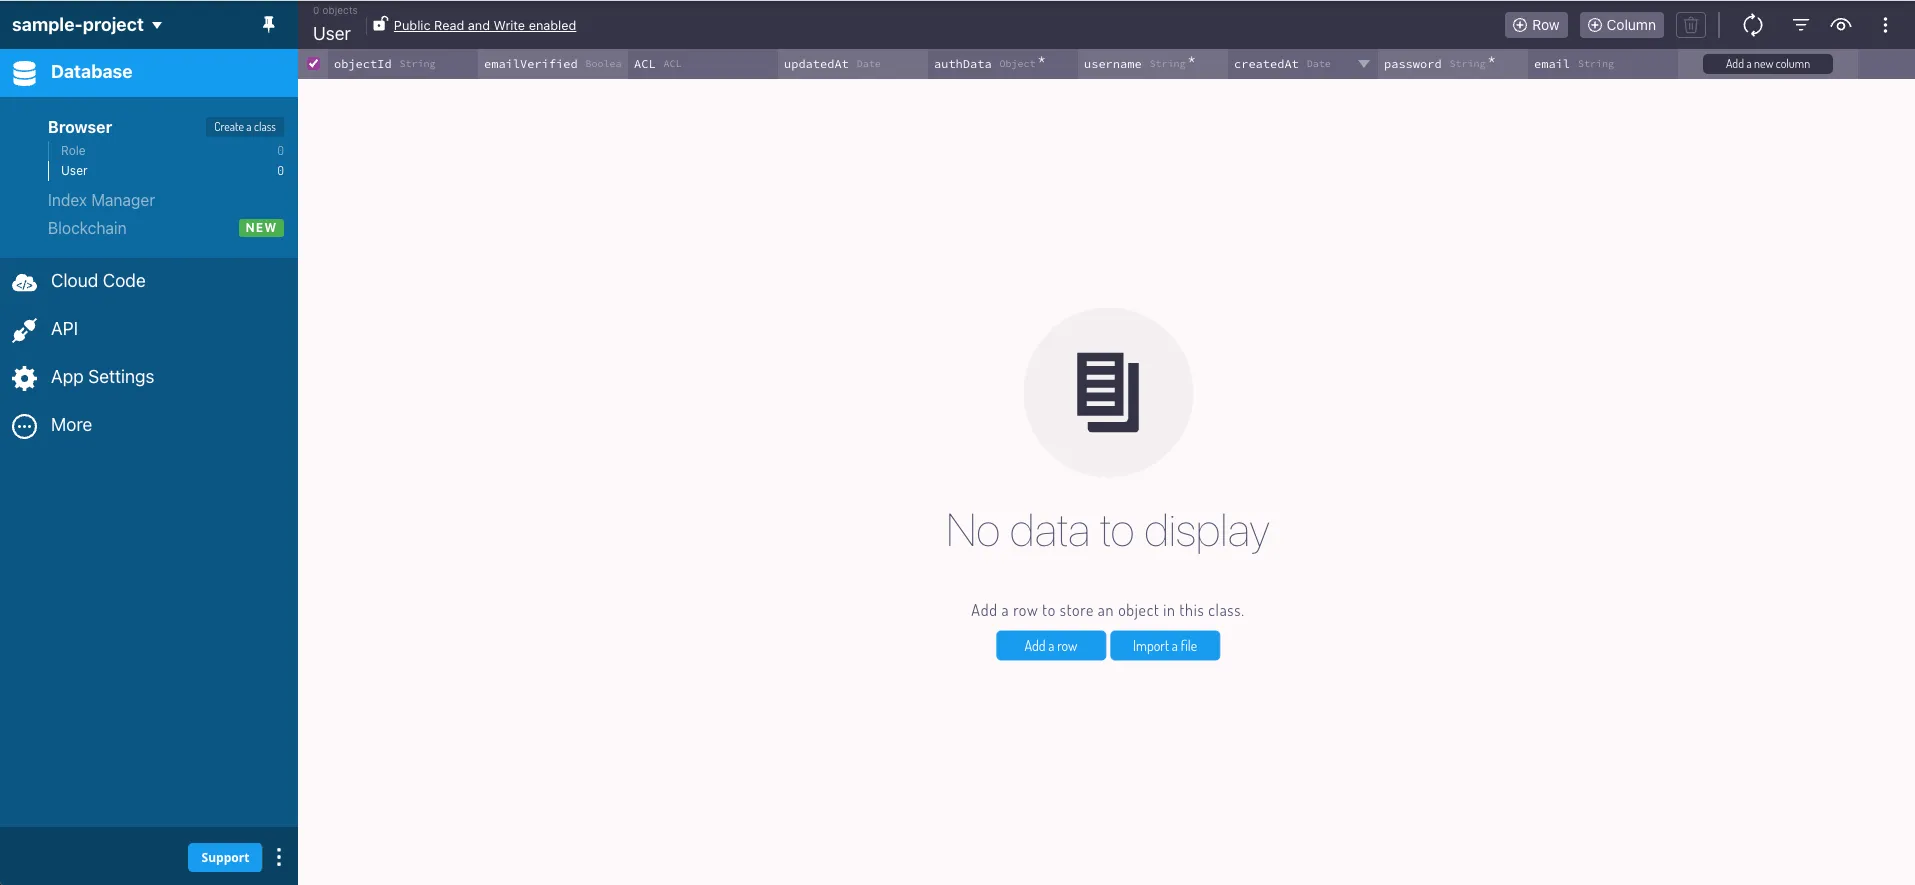
After a short loading screen you will see this screen. Congratulations, you have created your Back4App application!
5.Creating a Basic Frontend with Next.js:
Now we will create a simple project consisting of CRUD operations.
First, let’s install the react-icons package required for the icons in our project:
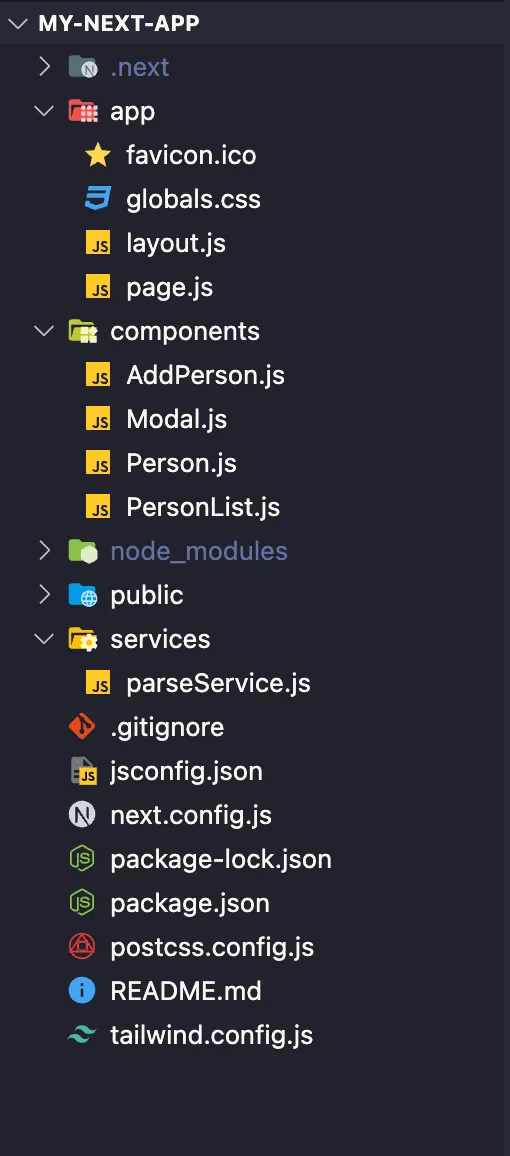
npm i react-iconsThe file structure of our project is like this:
globals.css
  @tailwind base;
  @tailwind components;
  @tailwind utilities;
layout.js
  import "./globals.css";
  import { Inter } from "next/font/google";

  const inter = Inter({ subsets: ["latin"] });

  export const metadata = {
    title: "Create Next App",
    description: "Generated by create next app",
  };

  export default function RootLayout({ children }) {
    return (
      <html lang="en">
        <body className={inter.className}>{children}</body>
      </html>
    );
  }
page.js
  "use client";

  import { useState, useEffect } from "react";
  import AddPerson from "@/components/AddPerson";
  import PersonList from "@/components/PersonList";
  import { getPersons } from "@/services/parseService";

  export default function Home() {
    const [persons, setPersons] = useState([]);

    useEffect(() => {
      const fetchData = async () => {
        const results = await getPersons();
        setPersons(results);
      };
      fetchData();
    }, []);

    return (
      <main className="max-w-5xl mx-auto mt-24">
        <div className="px-4 sm:px-6 lg:px-8">
          <div className="sm:flex sm:items-center">
            <div className="sm:flex-auto">
              <h1 className="text-base font-semibold leading-6 text-gray-900">
                Persons
              </h1>
            </div>
            <AddPerson setPersons={setPersons} />
          </div>

          <PersonList persons={persons} setPersons={setPersons} />
        </div>
      </main>
    );
  }
AddPerson.js
  "use client";

  import { useState } from "react";
  import Modal from "./Modal";

  const AddPerson = ({ setPersons }) => {
    const [openModal, setOpenModal] = useState(false);

    return (
      <div className="mt-4 sm:ml-16 sm:mt-0 sm:flex-none">
        <button
          type="button"
          className="block rounded-md bg-indigo-600 px-3 py-2 text-center text-sm font-semibold text-white shadow-sm hover:bg-indigo-500 focus-visible:outline focus-visible:outline-2 focus-visible:outline-offset-2 focus-visible:outline-indigo-600"
          onClick={() => setOpenModal(true)}
        >
          Add Person
        </button>

        {openModal && (
          <Modal setOpenModal={setOpenModal} setPersons={setPersons} />
        )}
      </div>
    );
  };

  export default AddPerson;
Modal.js
  import { useState } from "react";
  import { createPerson, updatePerson } from "@/services/parseService";

  const Modal = ({ setOpenModal, person, setPersons }) => {
    const isEditForm = !!person;

    const [form, setForm] = useState({
      name: person?.get("name"),
      email: person?.get("email"),
      address: person?.get("address"),
      phone: person?.get("phone"),
    });

    const handleChange = (e) => {
      setForm((prev) => ({
        ...prev,
        [e.target.id]: e.target.value,
      }));
    };

    const handleSubmit = async (e) => {
      e.preventDefault();

      if (!form.name || !form.email || !form.address || !form.phone) {
        return;
      }

      if (isEditForm) {
        const updatedPerson = await updatePerson(form, person.id);
        setPersons((prev) =>
          prev.map((person) =>
            person.id === updatedPerson.id ? updatedPerson : person
          )
        );
      } else {
        const newPerson = await createPerson(form);
        setPersons((prev) => [...prev, newPerson]);
      }
      setOpenModal(false);
    };

    return (
      <div className="fixed inset-0 flex items-center justify-center z-50">
        <div className="modal-overlay absolute inset-0 bg-gray-500 opacity-10"></div>
        <div className="modal-container relative bg-white w-11/12 md:max-w-md mx-auto rounded shadow-lg z-50 overflow-y-auto">
          <button
            onClick={() => setOpenModal(false)}
            className="modal-close absolute top-0 right-0 cursor-pointer mt-4 mr-4"
          >
            X
          </button>
          <div>
            <form className="rounded px-8 py-12" onSubmit={handleSubmit}>
              <div className="mb-6">
                <label
                  className="block text-gray-700 text-sm font-bold mb-2"
                  htmlFor="name"
                >
                  Name
                </label>
                <input
                  className="shadow appearance-none border rounded w-full py-2 px-3 text-gray-700 leading-tight focus:outline-none focus:shadow-outline"
                  id="name"
                  type="text"
                  placeholder="Name"
                  value={form.name}
                  onChange={handleChange}
                />
              </div>
              <div className="mb-6">
                <label
                  className="block text-gray-700 text-sm font-bold mb-2"
                  htmlFor="email"
                >
                  Email
                </label>
                <input
                  className="shadow appearance-none border rounded w-full py-2 px-3 text-gray-700  leading-tight focus:outline-none focus:shadow-outline"
                  id="email"
                  type="email"
                  placeholder="Email"
                  value={form.email}
                  onChange={handleChange}
                />
              </div>
              <div className="mb-6">
                <label
                  className="block text-gray-700 text-sm font-bold mb-2"
                  htmlFor="address"
                >
                  Address
                </label>
                <textarea
                  className="shadow appearance-none border rounded w-full py-2 px-3 text-gray-700 leading-tight focus:outline-none focus:shadow-outline"
                  id="address"
                  placeholder="Address"
                  rows="3"
                  value={form.address}
                  onChange={handleChange}
                />
              </div>
              <div className="mb-6">
                <label
                  className="block text-gray-700 text-sm font-bold mb-2"
                  htmlFor="phone"
                >
                  Phone
                </label>
                <input
                  className="shadow appearance-none border rounded w-full py-2 px-3 text-gray-700 leading-tight focus:outline-none focus:shadow-outline"
                  id="phone"
                  type="text"
                  placeholder="Phone"
                  value={form.phone}
                  onChange={handleChange}
                />
              </div>
              <div className="flex items-end justify-end">
                <button
                  className="bg-blue-500 hover:bg-blue-700 text-white font-bold py-2 px-4 rounded focus:outline-none focus:shadow-outline"
                  type="submit"
                >
                  {isEditForm ? "Update" : "Create"}
                </button>
              </div>
            </form>
          </div>
        </div>
      </div>
    );
  };

  export default Modal;
Person.js
  "use client";

  import { useState } from "react";
  import { FiEdit, FiTrash2 } from "react-icons/fi";
  import Modal from "./Modal";

  const Person = ({ person, handleDeletePerson, setPersons }) => {
    const [openModal, setOpenModal] = useState(false);

    return (
      <>
        <tr>
          <td className="whitespace-nowrap py-4 pl-4 pr-3 text-sm font-medium text-gray-900 sm:pl-0">
            {person.get("name")}
          </td>
          <td className="whitespace-nowrap px-3 py-4 text-sm text-gray-500">
            {person.get("email")}
          </td>
          <td className="whitespace-nowrap px-3 py-4 text-sm text-gray-500">
            {person.get("address")}
          </td>
          <td className="whitespace-nowrap px-3 py-4 text-sm text-gray-500">
            {person.get("phone")}
          </td>
          <td className="relative whitespace-nowrap py-4 pl-3 pr-4 text-sm font-medium sm:pr-0">
            <button
              type="button"
              className="py-2"
              onClick={() => {
                setOpenModal(true);
              }}
            >
              <FiEdit className="w-5 h-5 text-blue-600" />
            </button>

            <button
              type="button"
              className="py-2 ml-4 text-red-600"
              onClick={() => {
                if (confirm("Are you sure you want to delete this person?")) {
                  handleDeletePerson(person.id);
                }
              }}
            >
              <FiTrash2 className="w-5 h-5" />
            </button>
          </td>
        </tr>

        {openModal && (
          <Modal
            setOpenModal={setOpenModal}
            person={person}
            setPersons={setPersons}
          />
        )}
      </>
    );
  };

  export default Person;
PersonList.js
  "use client";

  import Person from "./Person";
  import { deletePerson } from "@/services/parseService";

  const PersonList = ({ persons, setPersons }) => {
    const handleDeletePerson = async (personId) => {
      await deletePerson(personId);
      setPersons((prev) => prev.filter((person) => person.id !== personId));
    };

    return (
      <div className="mt-8 flow-root">
        <div className="-mx-4 -my-2 overflow-x-auto sm:-mx-6 lg:-mx-8">
          <div className="inline-block min-w-full py-2 align-middle sm:px-6 lg:px-8">
            <table className="min-w-full divide-y divide-gray-300">
              <thead>
                <tr className="text-sm font-semibold text-left text-gray-900">
                  <th className="pl-4 pr-3 sm:pl-0">Name</th>
                  <th className="px-3 py-3.5">Email</th>
                  <th className="px-3 py-3.5">Address</th>
                  <th className="px-3 py-3.5">Phone</th>
                  <th className="px-3 sm:pr-0">Actions</th>
                </tr>
              </thead>
              <tbody className="divide-y divide-gray-200">
                {persons?.map((person) => (
                  <Person
                    person={person}
                    handleDeletePerson={handleDeletePerson}
                    key={person.id}
                    setPersons={setPersons}
                  />
                ))}
              </tbody>
            </table>
          </div>
        </div>
      </div>
    );
  };

  export default PersonList;
tailwind.config.js
  /** @type {import('tailwindcss').Config} */
  module.exports = {
    content: [
      "./pages/**/*.{js,ts,jsx,tsx,mdx}",
      "./components/**/*.{js,ts,jsx,tsx,mdx}",
      "./app/**/*.{js,ts,jsx,tsx,mdx}",
    ],
    theme: {
      extend: {},
    },
    plugins: [],
  };
6.Connecting Next.js Project to Back4App:
Let’s now install the only needed dependency, Parse JavaScript SDK, to integrate your App with Back4App servers. Run the following command on your project root directory:
npm install parseGo to your Back4App App’s Dashboard and get your App Keys under App Settings->Security & Keys . Note that you will need two keys to connect with Back4App, the Application ID and Javascript KEY.
Go to your parseService.js fileand initialize the Parse SDK using both the Application ID and the Javascript KEY.
  // Import Parse minified version
  import Parse from "parse/dist/parse.min.js";

  // Your Parse initialization configuration goes here
  const PARSE_APPLICATION_ID = "YOUR_APPLICATION_ID_HERE";
  const PARSE_JAVASCRIPT_KEY = "YOUR_JAVASCRIPT_KEY_HERE";
  const PARSE_HOST_URL = "https://parseapi.back4app.com/";

  Parse.initialize(PARSE_APPLICATION_ID, PARSE_JAVASCRIPT_KEY);
  Parse.serverURL = PARSE_HOST_URL;
Code Samples for Basic CRUD Operations
We can write our Create, Read, Update, and Delete operations in the parseService.js file.
  // Import Parse minified version
  import Parse from "parse/dist/parse.min.js";

  // Your Parse initialization configuration goes here
  const PARSE_APPLICATION_ID = "YOUR_APPLICATION_ID_HERE";
  const PARSE_JAVASCRIPT_KEY = "YOUR_JAVASCRIPT_KEY_HERE";
  const PARSE_HOST_URL = "https://parseapi.back4app.com/";

  Parse.initialize(PARSE_APPLICATION_ID, PARSE_JAVASCRIPT_KEY);
  Parse.serverURL = PARSE_HOST_URL;

  // READ
  export const getPersons = async () => {
    const Person = Parse.Object.extend("Person");
    const query = new Parse.Query(Person);

    try {
      let results = await query.find();
      return results;
    } catch (error) {
      console.log(error);
    }
  };

  // CREATE
  export const createPerson = async (user) => {
    const Person = Parse.Object.extend("Person");
    const person = new Person();

    person.set("name", user.name);
    person.set("email", user.email);
    person.set("address", user.address);
    person.set("phone", user.phone);

    try {
      const result = await person.save();
      return result;
    } catch (error) {
      console.log(error);
    }
  };

  // UPDATE
  export const updatePerson = async (formValues, personId) => {
    const Person = Parse.Object.extend("Person");
    const query = new Parse.Query(Person);

    try {
      const result = await query.get(personId);
      result.set("name", formValues.name);
      result.set("email", formValues.email);
      result.set("address", formValues.address);
      result.set("phone", formValues.phone);
      result.save();
      return result;
    } catch (error) {
      console.log(error);
    }
  };


  // DELETE
  export const deletePerson = async (personId) => {
    const Person = Parse.Object.extend("Person");
    const query = new Parse.Query(Person);

    try {
      const result = await query.get(personId);
      result.destroy();
    } catch (error) {
      console.log(error);
    }
  };
Test your App
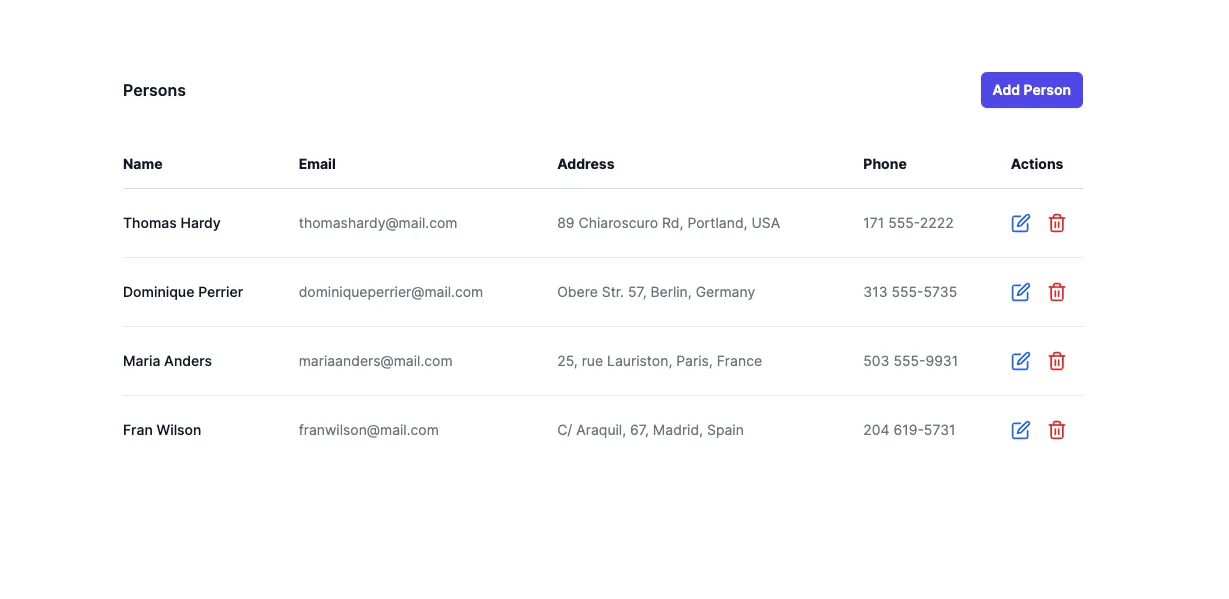
After running your project with the npm run dev command, add a new person with the Add Person button.
You’ve saved a data object from Back4App. You can also check the data on your App Dashboard and clicking on Person class.
Now our app is ready to deploy.
7.Deploying the Next.js Frontend with Cloudflare Pages:
Before deploying your frontend, set up a Git repository for your project. After setting up your project and pushing it to GitHub or GitLab, the next step is to deploy your website using Cloudflare Pages. Here’s a step-by-step guide on how to do this:
A) Log in to Cloudflare: Visit the Cloudflare dashboard and log in to your account. If you don’t have an account, you’ll need to create one.
B) Navigate to Cloudflare Pages: On your account’s homepage, go to Workers & Pages from the left menu. Then go to the pages section. This is where you will manage your deployments.
C) Connect to Git: Click on the “Connect to Git” button and connect your GitHub or GitLab account. You’ll need to authorize Cloudflare Pages to access your repositories.
D) Select Repository: Choose the git repository that contains your project. Then click the Begin Setup button.
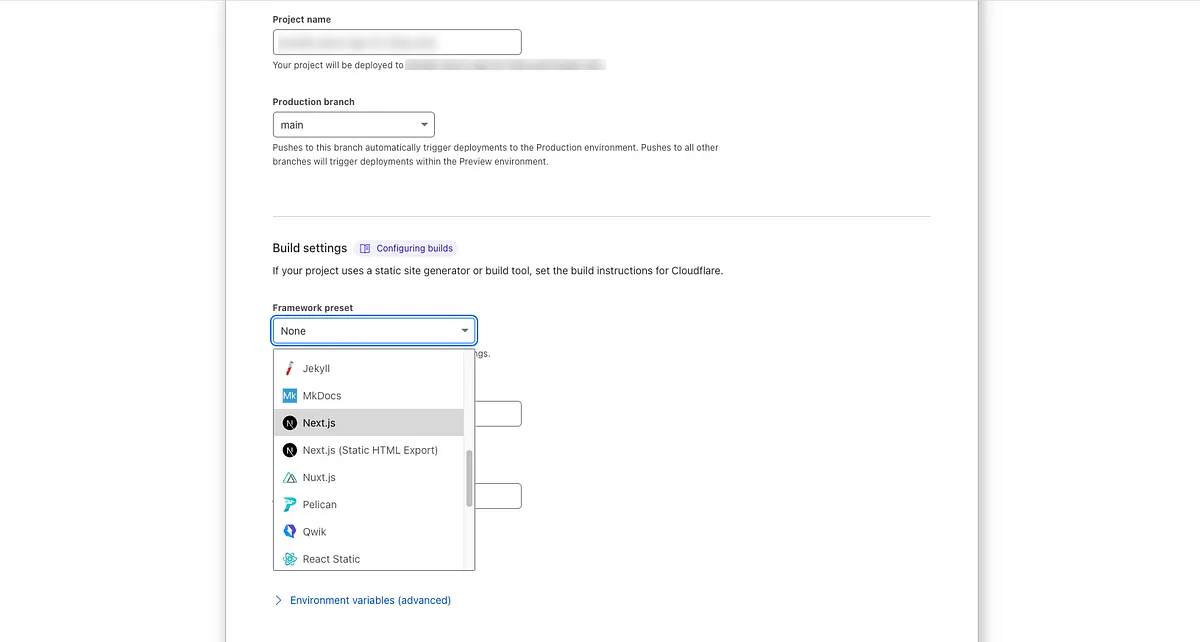
E) Set up builds and deployments: All we need to do in this step is to select Next.js from the Framework preset section and then click the Save and Deploy button.
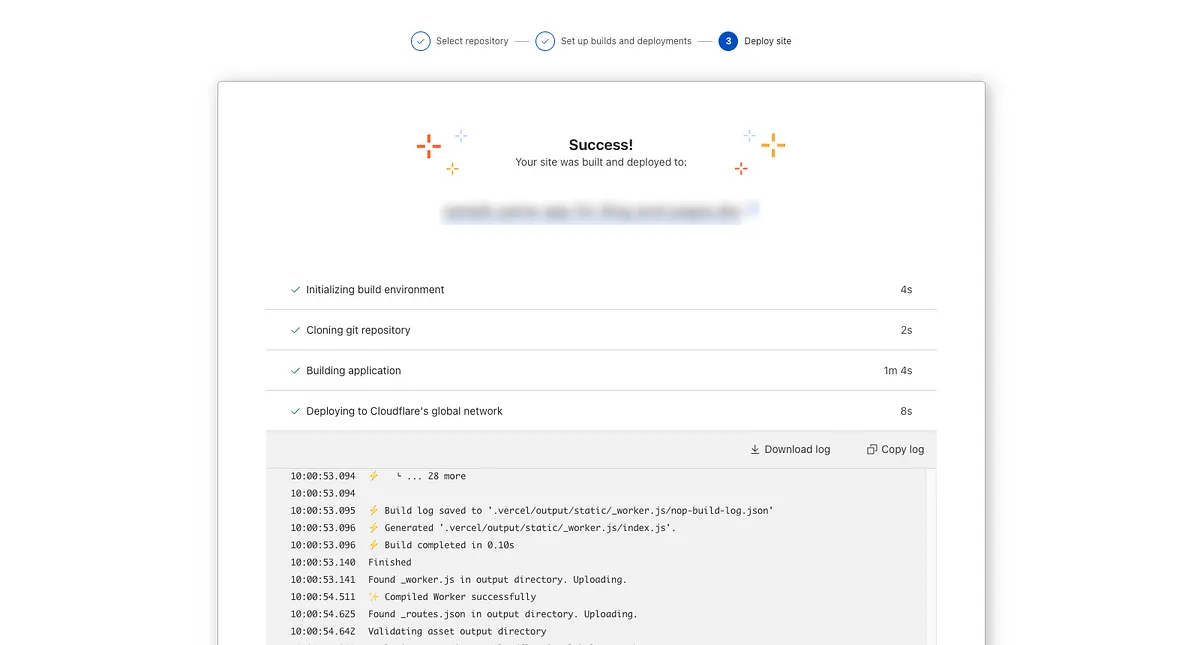
F) Congratulations! : After a short wait, your website will be deployed. You can go to your website by clicking on the link.
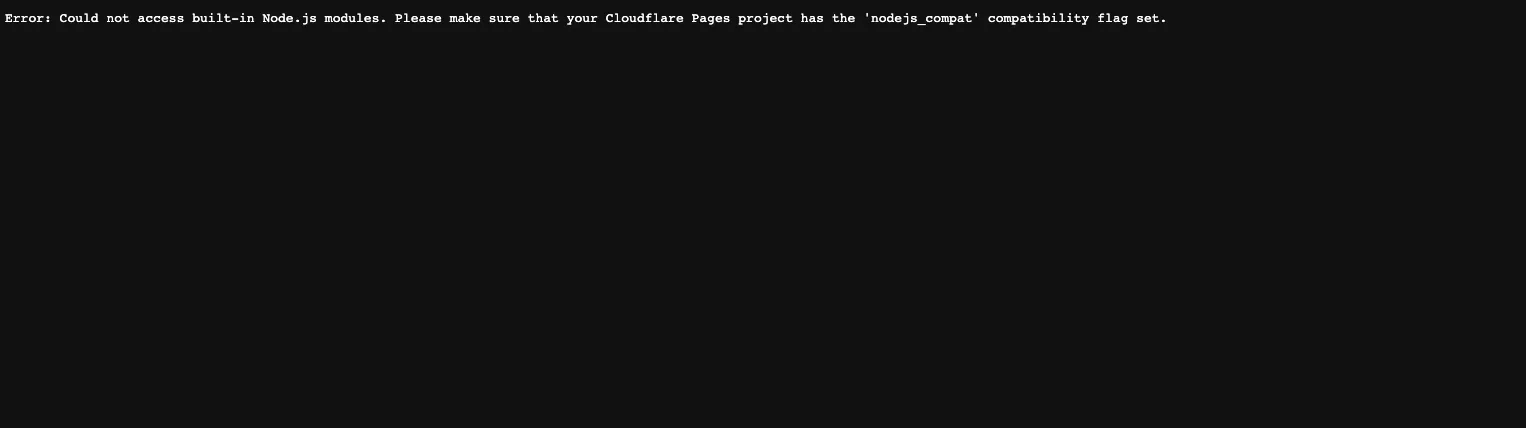
Note: If you see this error when your site opens, don’t worry.
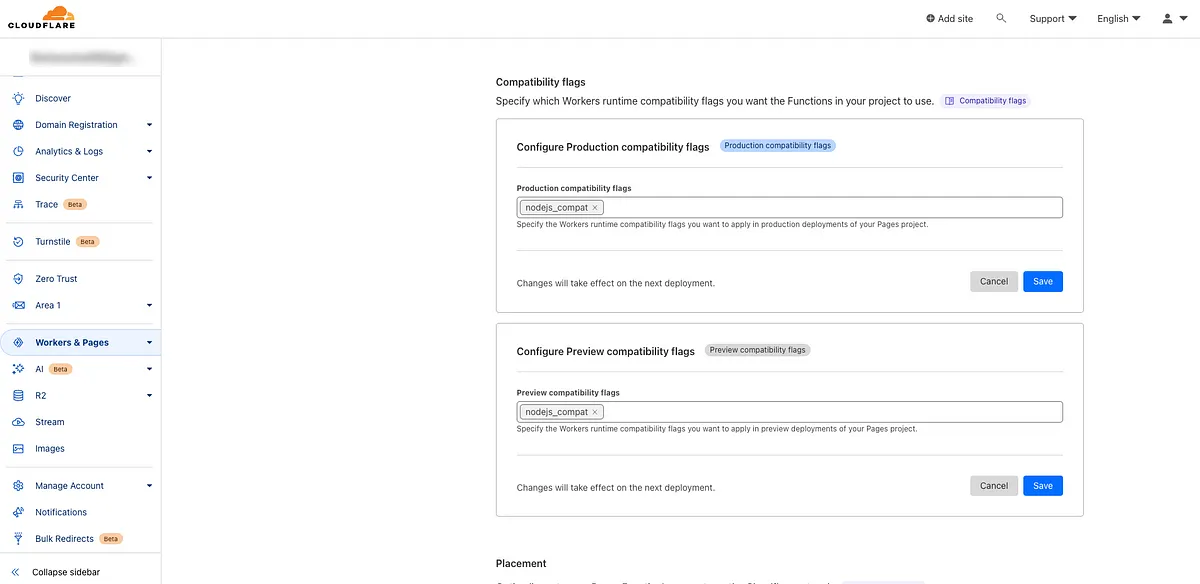
• Select Workers - Pages and in Overview, select your Pages project.
• Select Settings - Functions - Compatibility Flags.
• Add the nodejs_compat compatibility flag to your Preview and Production deployments.
• After saving both with the save button, go to the Workers & Pages section again. Click on the View Details button at the bottom right of your project.
• Click on the Manage Deployment button at the top right and select the Retry Deployment option. After a short wait, your site will be deployed again and you will no longer see any errors when you go to your site.
8.Example Project Repository and Live Demo:
To explore the code and experience the example project live, you can access the following links:
Live Demo
Github Repository
Conclusion
In this tutorial, you have learned how to build a full-stack web application using Next.js, Node.js, Parse Server, Back4App, and Cloudflare. You now have the knowledge to create and deploy your projects. Consider extending your application’s features and sharing your creations with the community.
Happy Coding!